> ## Documentation Index
> Fetch the complete documentation index at: https://wavecnct.com/docs/llms.txt
> Use this file to discover all available pages before exploring further.
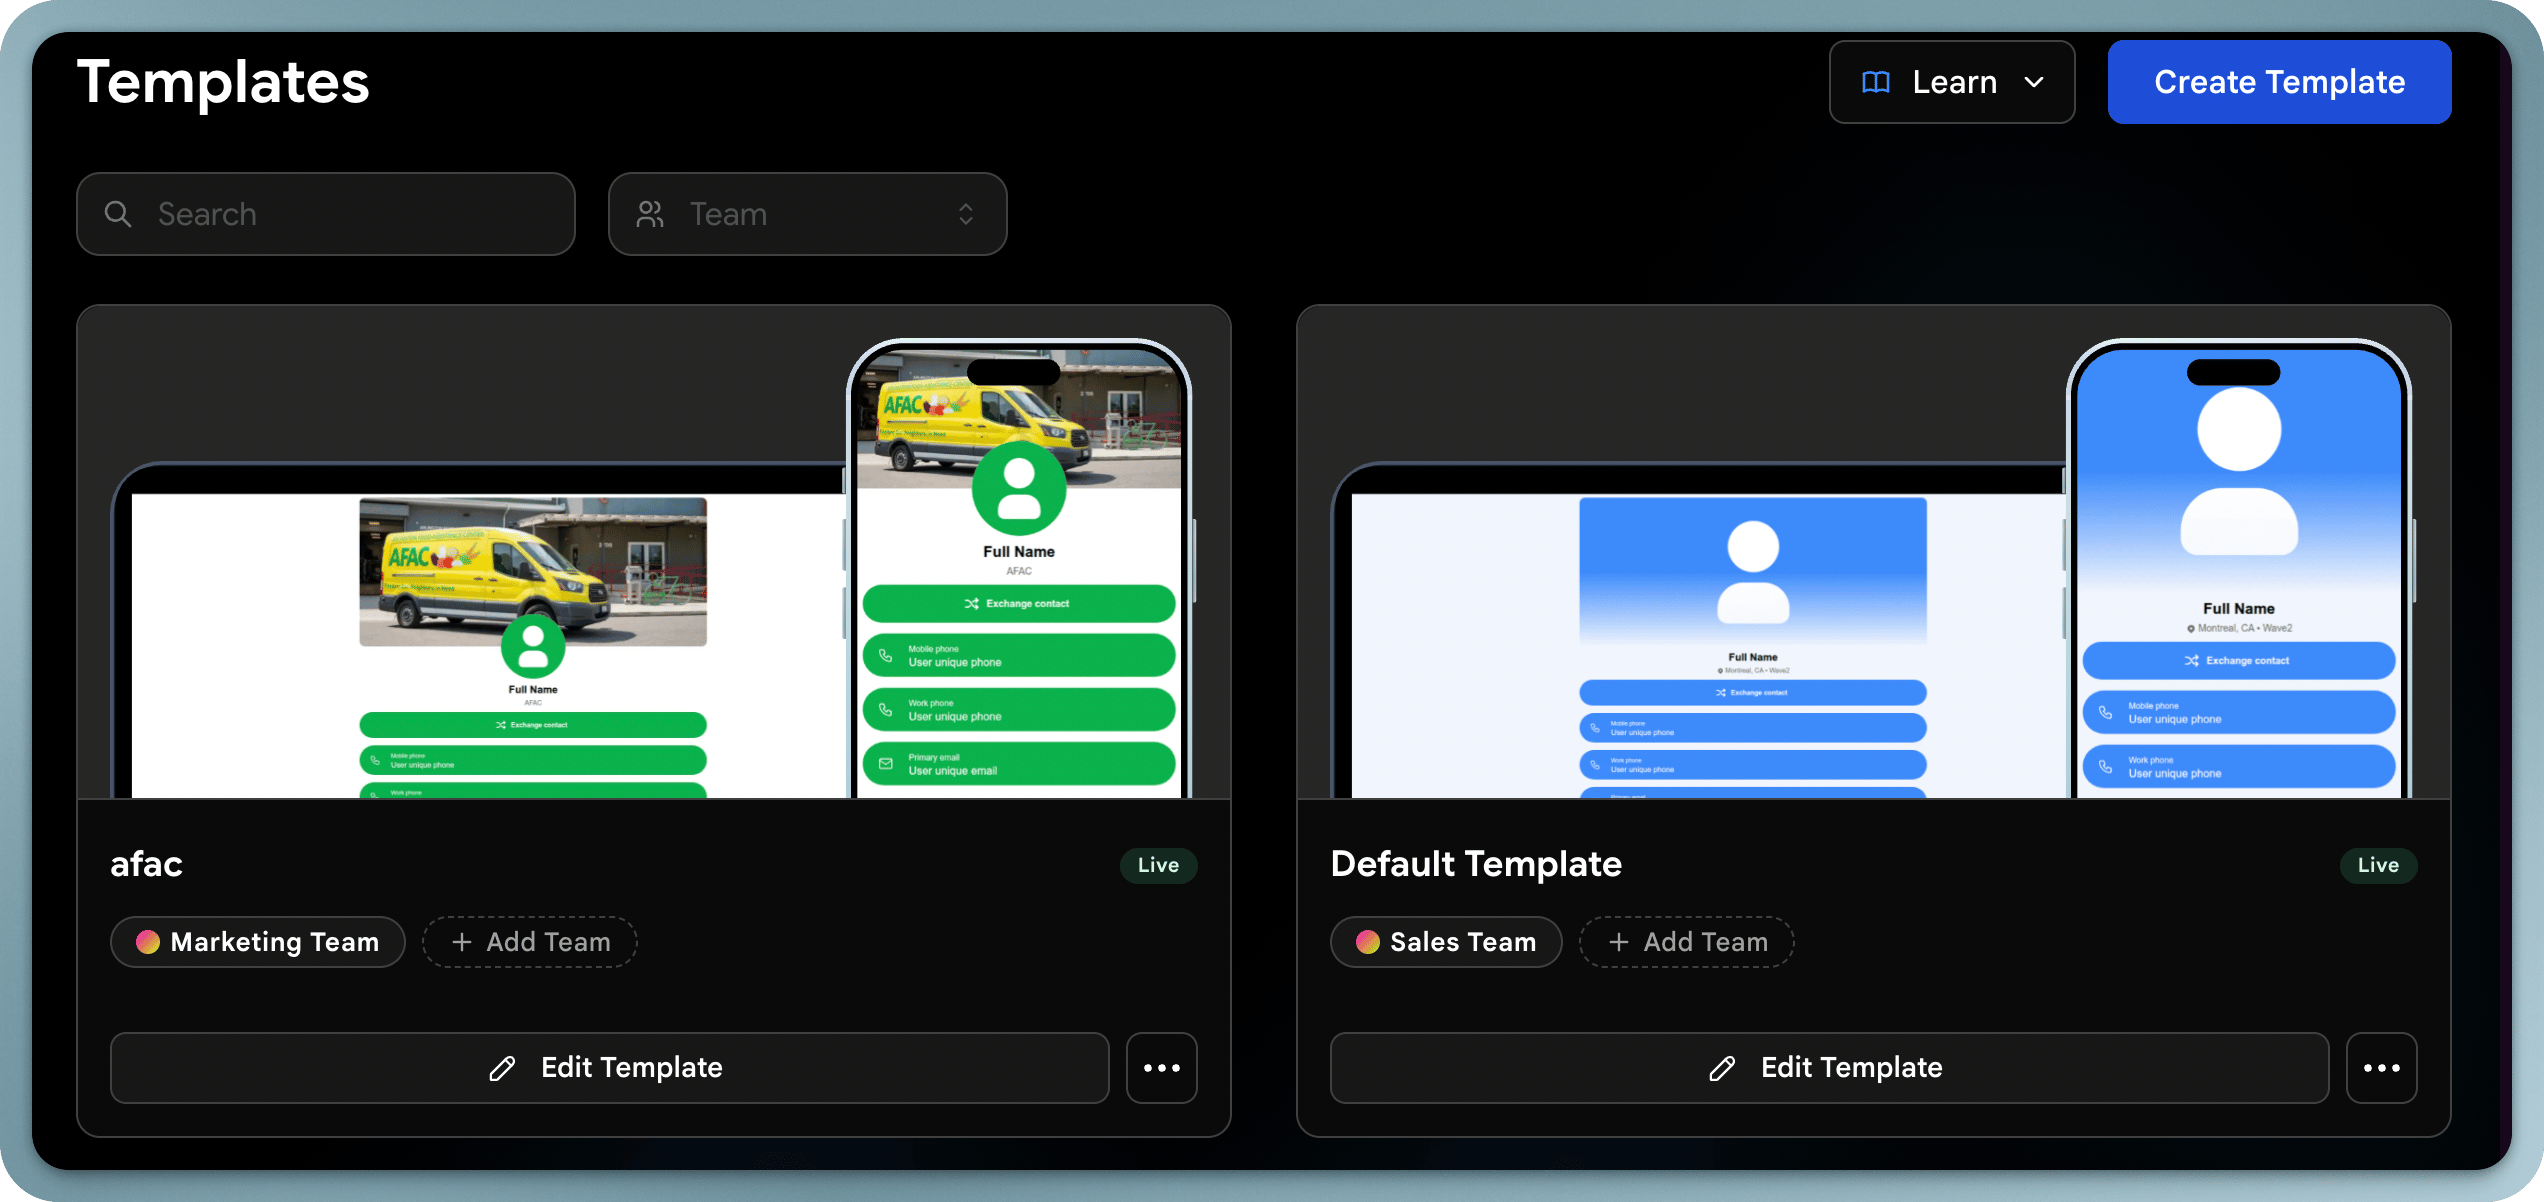
# Templates
> Create consistent digital business cards across your team with templates
Available on the **Teams** and **Enterprise** plans.
 Templates let admins design a standard card layout and apply it across users or teams. They ensure brand consistency while still allowing individual personalization where needed.
## How Templates Work
A template defines:
* **Content**: Which sections appear on the card (links, social media, files, etc.)
* **About**: Job title, company, location, and calendar (Calendly) link
* **Appearance**: Colors, fonts, and layout of the digital business card
* **Lead form**: The contact exchange form recipients see
* **Digital Wallet**: Apple Wallet and Google Wallet appearance
* **Email Signature**: The email signature applied across your template
* **Locked fields**: Fields that users cannot edit (ensuring consistency)
## Template vs. User Profile
| Aspect | Template (Admin) | User Profile |
| --------------- | ----------------------- | ----------------------- |
| Card appearance | Set by template | Inherited from template |
| Company name | Locked by admin | Cannot change |
| Name & title | Unique field | User fills in |
| Profile photo | Unique field | User uploads |
| Social links | Can be locked or unique | Depends on template |
| Bio/About | Can be locked or unique | Depends on template |
## Creating a Template
In your admin dashboard, navigate to the **Templates** section.
Start building a new template.
Give it a descriptive name (e.g., "Sales Team", "Executive", "Event Staff").
Select the team that will use this template.
Apply the template to your team.
## Editing a Template
Editing a template updates the cards for all users assigned to it — making it easy to roll out design changes or content updates across your team.
Changes to a template affect all users assigned to it. Review carefully before saving, especially for large teams.
### Content
Define what content blocks appear on the card: links, social media profiles, files, documents, and videos.
### About
Set the company description, tagline, or supporting text shown in the About section of the card.
### Appearance
Configure the visual design: profile layout, colors, fonts, background image, and logo.
### Lead Form
Customize the contact exchange form: choose which fields to collect (name, email, phone, company, etc.).
### Wallet Card
Control how the card appears when saved to Apple Wallet or Google Wallet.
### Email Signature
Set the default email signature design applied across your team.
## Learn More
Lock fields to keep profiles consistent.
Understand unique vs. locked fields.
Templates let admins design a standard card layout and apply it across users or teams. They ensure brand consistency while still allowing individual personalization where needed.
## How Templates Work
A template defines:
* **Content**: Which sections appear on the card (links, social media, files, etc.)
* **About**: Job title, company, location, and calendar (Calendly) link
* **Appearance**: Colors, fonts, and layout of the digital business card
* **Lead form**: The contact exchange form recipients see
* **Digital Wallet**: Apple Wallet and Google Wallet appearance
* **Email Signature**: The email signature applied across your template
* **Locked fields**: Fields that users cannot edit (ensuring consistency)
## Template vs. User Profile
| Aspect | Template (Admin) | User Profile |
| --------------- | ----------------------- | ----------------------- |
| Card appearance | Set by template | Inherited from template |
| Company name | Locked by admin | Cannot change |
| Name & title | Unique field | User fills in |
| Profile photo | Unique field | User uploads |
| Social links | Can be locked or unique | Depends on template |
| Bio/About | Can be locked or unique | Depends on template |
## Creating a Template
In your admin dashboard, navigate to the **Templates** section.
Start building a new template.
Give it a descriptive name (e.g., "Sales Team", "Executive", "Event Staff").
Select the team that will use this template.
Apply the template to your team.
## Editing a Template
Editing a template updates the cards for all users assigned to it — making it easy to roll out design changes or content updates across your team.
Changes to a template affect all users assigned to it. Review carefully before saving, especially for large teams.
### Content
Define what content blocks appear on the card: links, social media profiles, files, documents, and videos.
### About
Set the company description, tagline, or supporting text shown in the About section of the card.
### Appearance
Configure the visual design: profile layout, colors, fonts, background image, and logo.
### Lead Form
Customize the contact exchange form: choose which fields to collect (name, email, phone, company, etc.).
### Wallet Card
Control how the card appears when saved to Apple Wallet or Google Wallet.
### Email Signature
Set the default email signature design applied across your team.
## Learn More
Lock fields to keep profiles consistent.
Understand unique vs. locked fields.